Showing posts with label Unclogging Printer. Show all posts

Sunday, May 8, 2016

The Danger of Old Inkjet Ink

The danger of old inkjet ink is that it gums up your inkjet printer. It's taken me years to learn this lesson!

In November of 2015, I purchased new black and yellow inks. Prior to this my black and yellow inks were over 7 years old. I was constantly adding water to these 7-year-old inks to make them flow better. Stubborn guy that I am, I would not break down and buy new ink.

It has been 6 months (almost) since I purchased new black and yellow inks. Finally! My print heads are now clear and I get a perfect black ink pattern and a perfect yellow ink pattern. The perfect patterns for yellow and black have perfect stair-steps.

I may be stubborn, but when faced with overwhelming evidence, I have to change my mind! About an hour ago, I re-ordered all new ink for by Epson R200. I ordered from inksupply.com.

My 6 new ink colors only cost $22.95, including shipping. Why did it take me so long to order 6 new 2 oz ink bottles and throw out the old inks that are over 7 years old? Incredible stuborness. Dogged, persistent, unyielding stubborness.

Having now learned my lesson, I plan to go in the completely opposite direction: I will be reordering new inks every year. Inksupply.com recommends that you only keep your inks about a year. I'm finally ready to absorb the wisdom of that recommendation.

Why I would think that the people who actually formulate inkjet ink would not know what they are talking about is now hard for me to understand. What took me so long to come around to their point of view?

I can apply this lesson to many other areas of my life. If something is not working, be willing to pursue the most obvious solution. Try something new!

I'm humbled.

Ed Abbott

Tuesday, April 29, 2014

Purging Only One Color at a Time on a Six Color Printer

For a long time now, I've wanted to be able to purge one color at a time with my six color Epson Stylus Photo R200 printer. Why? Because sometimes a single color will stop working.

Here are full-page images of nothing but one color. To get the images to print properly, do the following:

  1. Right click on the image
  2. Observe the drop-down menu that appears
  3. Choose to view the image in a new tab
  4. Observe that the image now fills your browser window from top to bottom
  5. Type Control-P to print the image.

The above steps work under Google Chrome. I've not tested other browsers. However, they should have something that is equivalent or nearly equivalent. There should be a way to do this in other browsers.

Here's black:

Here's cyan:

Here's light cyan:

Here's magenta:

Here's light magenta:

Here's yellow:

Now I have a way to purge an individual color with minimum impact on the other colors. Why do I care? Because this means I can fix one color without tinkering with all the rest.

As ink ages, it is likely that one color will act up and start clogging while all the others work fine. So, being able to purge one color at at time in order to get that color working again can be quite valuable.

Usually I have an 8-1/2 by 11 piece of paper that is now obsolete and I can now purge on top of. In effect, I'm using an old piece of paper as an ink blotter.

Another advantage of the one-color purge technique is that it is easy to tell when the color is working again. When all banding is gone and the color prints as a smooth consistency, the print head for that particular color is now clear.

There's always a way, isn't there? You just have to find out how.

Ed Abbott

Tuesday, January 8, 2013

Unclogging My Printer ---- Again!

Once again, I'm unclogging my Epson R200. Don't get me wrong. It's a great great printer. However, it's also an old printer --- over 7 years old.

I use refillable ink cartridges and these do tend to clog. I suspect it is because of the age of the ink. Some of my refillable ink bottles are years old.

The black ink is especially old. If I recall right, it is at least 5 years old. I'm noticing that it is starting to stick to the sides of the bottle rather than appear to be fully liquid.

As odd as it sounds, I suspect that some of the clumping is due to water evaporation. Even though the bottles appears to be fully sealed, the water must be escaping the black ink refill bottle one molecule at a time.

So, now, once again, I'm experimenting with adding distilled water to my ink. My ink cartridges take about 10-12 milliliters of ink. I just added 3 milliliters of distilled water to the cartridge. Therefore, the cartridge is now at least 25 percent added distilled water.

That might sound like an alarming addition of water. However, inkjet ink is mostly water anyway. So adding enough water to the ink to make the ink 25 percent added distilled water may not be as outrageous as it sounds.

I have no idea whether or not this is going to work. One reason I do not know is that the symptoms are a little bit different this time. This time, the black test pattern prints just fine except that it is a little skewed

It is a little skewed in such a way as to make some of the stair steps extra long. As many as 3 stair steps on the test pattern are together as one level stair step. Clearly this is not right.

Is this because the black ink is clumping together? I'm not sure. It may take a while to find out. If the ink is gumming up the works, it may take a while to fully clear the problem.

In the meantime, my printed documents look okay. The problem shows up as a certain amount of subtle banding in the type face. It's perfectly readable but not perfect. I'm going to observe the type face in the coming month to see if this problem clears up.

I've extended the life of my Epson R200 printer far beyond the point where most people would have given up. Can I extend its life a bit further?

Update: September 23, 2013

Adding 3 milliliters of ink to my ink cartridge has worked better than I dared hope. I no longer see banding when I print documents. Before, the banding was quite noticeable.

Furthermore, the test pattern that I produce when I hold down the formfeed on my R200 and hit the power bottom to power up seems to be almost, but not quite, perfect. When I first glanced at it I thought it was perfect.

Later I notice a slight skew in lines 2 and 3 (line 1 being at the bottom of the pattern). The stair steps are almost perfect, but not quite.

Since the printer is printing more or less perfectly now, I could probably afford to add a milliliter of water, or so, each time I refill the ink cartridge. I can also add a milliliter of distilled water to the remaining open ink bottles.

In this way, I might be able to solve the problem at its source which is old ink that does not seem to be fully hydrated. That's the theory.

In actual practice, I don't care. Since my R200 is 8 years old, it seems to me it is at the end of its useful life. Therefore, destroying the printer in the hopes of fixing it is a reasonable option.

I'm certainly not recommending anyone else add distilled water to their ink cartridges. I'm just saying that, so far, it appears to have worked for me and I appear to be getting away with it.

Update: March 14, 2014

A miracle occurred this morning! For the very first time, a perfect black ink pattern printed when I powered on my printer while holding down the form feed button at the same time. All the little black stair steps are perfect!

As I reported above on September 23, 2013, they were almost perfect on that day, but not quite. Now, careful and judicious adding of distilled water to my black ink cartridge has restored black ink printing completely!

I had not dared hope that it would turn out this way. But it did. So, now I'm ready to make some assumptions.

I assume, based on my experience, that ink dries out over time. That is to say, microscopic amounts of water evaporate from the bottles as the bottles cannot truly be considered vacuum sealed. After all, they are cheap plastic bottles. How could they possibly form a perfect seal that stops all water evaporation, one molecule at a time?

I further assume that inkjet ink can be re-hydrated. It has taken me over a year to re-hydrate my black ink. Perhaps this is because I was doing it experimentally and incrementally so as to not overdo it.

For me, this is very empowering information. No longer do I have to throw out ink or an entire inkjet printer because the ink won't flow. Water is the universal solvent. It appears to me that it is definitely the universal solvent for inkjet ink.

Please be aware that you can almost certainly ruin your printer by adding too much water to the ink cartridges. The natural tendency of water is to flow out of ink cartridges because ink cartridges have a hole in the bottom.

Inkjet ink is viscous for a reason, I'm guessing. It's viscous to keep the ink from leaking out of the bottom. For this reason, I was very careful to add only little tiny bits of distilled water at a time.

Just because I added distilled water to my inkjet cartridges does not mean you have to do it too. As they say on TV, Don't try this at home!.

I was willing to sacrifice my whole printer on my distilled water experiment. The reason I was willing to do this is because my printer was not working and I was going to have to throw it out anyway. You may feel very differently about your printer, especially if it is working.

Also be aware the leaking water can cause electrical shorts that could lead to electrocution and possible death. Again, no one is recommending that you add water to your inkjet cartridges. Call your printer manufacturer's 800 number for better advice than I could possibly give. They know what they are talking about. I don't. I'm merely experimenting.

If in doubt, don't do it. Don't add distilled water to your inkjet cartridges. That's my best advice.

Update: April 16, 2014

I've been working on a formula for re-hydrating ink. The formula is this: Add 1 milliliter of distilled water for every 1/2 fluid ounce of ink.

This seems like a fairly conservative formula. Since my ink cartridges are about 12 milliliters, 1 milliliter is less than 10 percent of the total. I've added at least 1 milliliter of distilled water to my ink cartridges many times. In fact, I've added up to 3 milliliters of ink to an ink cartridge in order to get the ink flowing again.

1/2 fluid ounce is almost, but not quite, 15 milliliters. So, adding 1 milliliter per 1/2 fluid ounce is well under 10 percent dilution of the ink.

I have 3 black ink bottles, all of them with old ink. One of them is 2 fluid ounces, the next one is 4 fluid ounces and the third one is 16 fluid ounces (1 pint).

The following table can be used to hydrate these 3 ink bottles using the above formula:

Bottle Size Add This Amount
of Distilled Water
2 fluid ounces 4 milliliters
4 fluid ounces 8 milliliters
1 pint or 16 fluid ounces 32 milliliters

Recently, I more or less did exactly what the above table would suggest to my 3 bottles of black ink. Except that I made a mistake.

I miscalculated and added twice as much distilled water to my 2 fluid ounce bottle and my 4 fluid ounce bottle as I should have. However, I doubt my printer will suffer because of my mistake.

Doubling up on the amount of distilled water will probably not hurt the printer as the above table is, by design, a fairly conservative one.

Ed Abbott

Wednesday, February 15, 2012

Unclogging Magenta On My Epson R200 Printer

I'm currently trying to get the following
image to print correctly:


It does not print correctly. Seems that my
magenta nozzle is completely clogged. I've
run a test pattern on it several times.

According to the test pattern, all the other
colors are perfect and magenta is non-existent.

What's weird is that the above block, which I've
created, is really not magenta at all. It's
really a dark red, a sort of rust color. At least
to my eye it is.

However, it is this color that seems to be the
most magenta deficient based on experimenting and
trial and error.

When the above color is printed, it appears to my
eye as yellow. So, the above color seems to be
relying on magenta and yellow exclusively, and does
not seem to have any dependence on light magenta
(the other magenta) at all. It only depends on
magenta and yellow.

However, if I change the above color to what I
would consider to be magenta, it prints beautifully.
Don't quite understand this.

In any case, it is the above color that is very
very deficient on my printer. I'm going to try printing
this image every day over the next few days to see
if I can clear the nozzle.

Here's my second try a creating a pure magenta image:


This second image, when printed without magenta ink,
produces orange. The first image produced yellow.
This one produces orange.

I'm getting closer to producing a pure magenta image.
I came up with this second image by spilling epson
magenta ink on newspaper and then eyeballing the
color, as it appears on top of newspaper print, to
see if I could produce a similar color. The second
image is the result.

Think I'll leave off and try this in a day or two
to see if time will clear the clog.

Update: February 18, 2012

I'm back at it again. Here's the new image
I"m working with:


The result is the same. I con't seem to get the
iamge to print correctly. This time the image
comes out lime green. As you can see, this image
is brown.

Once again, I've uploaded an image that makes heavy
use of magenta. Once again, magenta is failing to
print faithfully. Lime green is not in any way faithful
to brown.

This morning I had an idea. Since the problem seems to
be a dried out sponge in my printer cartridge, why not
reverse my approach? Why not inject ink into the sponge
directly, rather than indirectly?

My magenta ink cartridge has two ink reservoirs. One reservoir
is on the left, the other is on the right. One reservoir has
a sponge in it, the other does not.

I've just figure out a new strategy for re-inking the sponge
half of the cartridge. This is the half that is all dried
out.

Why not reverse the flow? Why not inject ink into the ink
outflow that feeds the printer ink?

I've done just that. Instead of injecting ink into the inflow,
I've injected ink into the outflow. The outflow is found at the
bottom of the ink cartridge and in the inflow is found at the
top of the ink cartridge underneath a plug that seals the inflow.

MIS Inks (www.inksupply.com) has supplied me with an attachment
that is normally used to suck ink out of the outflow. MIS Inks
suggests that you suck a little bit of ink out of the ink cartridge
each and every time you refill the cartridge with ink.

This morning, I reversed this process. I used the suction attachment
to inject ink into the outflow instead of sucking ink out of it. I
injected as much ink as I could into the sponge.

At the top of the sponge, there's a pinprick-sized hole that allows
air to enter the sponge so that ink can drop out of the bottom of
the sponge as air enters the top of the sponge. In this way, the
pinprick hole compensates for ink dropping through the ink outflow
at the bottom of the cartridge.

Basically, the pinprick hole is part of an air-in/ink-out system. When
the ink flows out, air has to replace the ink or the ink will sotp
flowing.

I injected as much ink as I could into the sponge without violating this
pinprick hole by filling it with ink.

I just tried printing a photo and the magenta is now working! Later, I'll
try printing something bigger that requires more magenta ink and see what
happens.

For now, I'm going to give my ink cartridge a rest to see if the ink on
the sponge side and the ink on the ink reservoir side can unplug each
other and start feeding each other again. The goal is to get the two
reservoirs flowing ink between themselves again.

I assume that is the problem. I assume that the flow from one reservoir
to the other is blocked because the sponge has dried out.

Update: February 29, 2012

I need a technique to recover a sponge that has dried out.
I'm working on that now.

Yesterday, I went to the grocery store to buy two items: I
bought a gallon of distilled water. In the pharmacy section,
I bought an eye-dropper.

Yesterday afternoon, I put 7 drops of distilled water in the
sponge side of the ink reservoir. I followed the following
steps to do so:

  1. I pressed the ink button, the left-most
    button on my Epson R200
  2. I waited for the ink cartridge carrier
    to move closer to the center of the
    printer
  3. When the ink cartridge carrier
    has stopped moving, I opened up the door
    on top of the ink cartridge carrier
  4. I took out the magenta ink cartridge
  5. I placed a piece of paper on my desk to
    sop up any spilled ink or water
  6. I place the ink cartridge on the piece
    of paper on my desk
  7. In placing the ink cartridge, I balanced
    it so that the top of the cartridge was on top
    and the bottom on the bottom. It takes a flat
    surface to be able to do this and not have
    the ink cartridge fall over.
  8. I grabbed a magnifying glass to look at
    the air intake hole which is just on top of
    the sponge.
  9. I took the eye-dropper and got a few drops
    of distilled water out of the gallon jug I
    had purchased
  10. I put precisely one drop of distilled
    water on the intake hole
  11. Because the air intake hole has sides,
    capillary action caused the intake hole
    to very slowly, but surely absorb the
    water.
  12. I watched the air intake hole absorb the
    one drop of water through my magnifying glass
  13. When the air intake hole was clear, I put
    another drop of distllled water on top of the
    air intake hole
  14. It took approximately 5 minutes between
    drops of water for the air intake hole to absorb
    the water fully.
  15. I kept adding 1 drop of water to the air
    intake hole until I had put 7 drops of distilled
    water in the air intake hole

Watching distilled water be absorbed into the air
intake hole through a magnifying glass is quite
fascinating. The magnifying glass I used is quite
large, larger than most.

Later, I'm going to try to print with my printer
and see what happens. The goal remains the same.
I want to recover the ink cartridge for magenta
ink completely!

Update: March 1, 2012

I'm still working with distilled water trying
to get the magenta ink to print normally. Yesterday,
I tried putting distilled water into the air intake
hole on the cartridge.

This went OK but was terribly slow. Also, it did
not work. I waited 24 hours before trying to print
again but only a trickle of magenta ink was coming
out.

I then started reading about inkjet ink. I read that
glycerin is used to make the ink more viscous.

I was worried that if I added distilled water to my
ink reservoir, it would cause more surface tension
in the water and the ink would not flow.

My new understanding is that distilled water makes
the ink less viscous, not more viscous. If you add
distilled water, the ink should flow even better.

I feel this is exactly what I need to make my printer
work properly. I need for the ink to flow better
so that the sponge becomes saturated with ink again.
It appears to me that the sponge has dried.

This afternoon, I added approximately 2 milliliters
of water to the ink reservoir. It will be interesting
to see if the magenta ink starts flowing better now.

Update: March 2, 2012

It's been about 17 hours since I added 2 milliliters
of water to the magenta ink reservoir. Prior to adding
water, the magenta ink resevoir was more than half full.
After I added water, it was full to the top, all the way
up to the plug. I put in as much water as I could without
spilling any ink.

I just printed an Epson test pattern. That's the pattern
where each color prints separately and each color has lines
that slope downward from left to right.

When the test pattern prints perfectly, there are no gaps
in the line. When it prints imperfectly, it either does
not print at all or there are gaps in the lines.

Just now I printed this pattern and it is markedly improved
over what it was before. Now it is about 90 percent filled
in and about 10 percent gaps.

When I printed the test pattern yesterday, the gaps were much
more extensive. I'd say that the pattern was maybe 50 percent
gaps.

I'm going to try printing this pattern again later, but otherwise
I'll just let the printer sit and absorb ink. It will be interesting
to see if the printer starts printing a perfect pattern test
again.

Update: March 3, 2012

Today and yesterday, I printed the Epson test pattern. Yesterday,
the test pattern had 4 horizontal lines missing. Today the test pattern
has only 3 vertical lines missing.

Does this mean the test pattern is getting better for the magenta
ink? I'm not sure. All the inks, except magenta, have a test pattern
with 100 percent of the horizontal lines present.

Here I write about the test pattern:

Unclogging My Epson R200 Printer

I find it fascinating that when I print the test pattern twice
in a row today, the exact same 3 horizontal lines are missing.

For each color, there are 90 horizontal lines in the text pattern.
At first, this might not appear to be the case. The test pattern
appears to be diagonal lines only.

However, when I look under a magnifying glass, I see 10 horizontal
lines that make up each diagonal line. Each diagonal line consists
of 10 stair steps.

Since there are 9 diagonal lines, the total number of little tiny
horizontal lines, or stair steps, is 90 (9 times 10 steps per diagonal).

I think I'll let the ink, with the water added, soak and soak into
the sponge until I get a perfect test pattern. I hope this does
the trick. I hope that the extra wetness of the water restores
the sponge to full function and capacity.

Maybe this will take a week or more. We'll see.

Update: March 6, 2012

Finally! My magenta cartridge is working perfectly!

Yesterday, I printed all 3 images above and they printed
perfectly. No gaps. No banding. No problems.

Oddly enough, the color did not seem to change all that much
even though I diluted magenta with 2 milliliters of distilled
water. I suspect that is because ink is mostly water anyway.
The percentage that is dye is very very low, so diluting the dye
does not seem to have that much of an effect.

The only thing that was not working quite right after I printed
the above 3 images is the test pattern. That pesky old test pattern.
It still had 3 horizontal lines missing out of 90 lines total.

I then went to the control panel under Windows XP. If I recall
right, I found printers and faxes and then clicked on my model
o printer. Next, I clicked Select printer preferences and then
the maintenance tab.

Under maintainence, I did a nozzle check. The pattern printed
with a few horizontal lines missing.

Next, I did a cleaning cycle, which again, is under maintenance.
After one cleaning cycle, I did the nozzle check a second time. All
90 horiazontal lines (for magenta ink) printed perfectly!

Hopefully I'm done with this episode. Hopefully, magenta will work
perfectly from now on.

The life lesson? There's always a way, and don't give up too soon.

Update: May 14, 2012

Adding a little bit of distilled water to my magenta
print cartridge has worked flawlessly! Magenta now
prints just fine each and every time.

Update: Cctober 3, 2012

This solution has been flawless! I've not had any trouble with my magenta cartridge in about 6 months. Furthermore, I've not had to add any more distilled water. It seems, so far, that adding distilled water is something I needed to do 1 time only.

Update: March 5, 2013

My flawless solution has turned out to not be so flawless. What I really should have done was order a new ink cartridge and ink or even a new printer.

Yes, I've been able to get the magenta to limp along but it does tend to clog periodically. The lesson? Once one of the ink cartridges is flawed, it is always flawed.

I cleared it this morning by putting 2 millliters of distilled water in the bottom of the ink cartridge first and then adding ink. Yes, that works. Nothing flows better than pure unadulterated distilled water. It is the universal solvent.

I've learned a lot, but I've also purchased a new printer which I've yet to set up. I love Epson printers so I've purchased another Epson.

Update: September 23, 2013

Magenta has been printing perfectly for quite some time now on my old Epson Photo R200 printer. I've yet to set up the new printer, or even open the box. Adding 2 milliliters of ink to the cartridge seems to have worked!

Note that as a general rule, whenever I add a measured amount of water to the ink cartridge, I also add the same amount of water to the ink bottle it came from if the bottle is old. Why not treat the problem at its source?

Old ink is old ink. Adding the same amount of water to the cartridge and the remaining open ink bottles keeps all my magenta ink well hydrated.

My assumption is that my old ink bottles have been leaking water 27 molecules a minute, or whatever. The 27 molecules a minute is a wild wild guess on my part and is not intended to be taken seriously.

However, no ink bottle that costs less than a dollar is going to have a perfect seal. Even a 1 micron gap between the bottle cap and the lip of the bottle would allow some water to escape. That's where my image of 27 escaping molecules a minute comes from. It comes from assuming no el cheapo bottle cap is going to seal the liquid inside the bottle perfectly.

The ultimate solution? Don't buy too much ink at one time. That's why I'm in trouble. I purchased too much ink and it aged several years. So, the ultimate solution is new ink.

Ed Abbott

Saturday, November 12, 2011

Unclogging My Epson R200 Printer

I love my Epson Printer! It works so
well. Unfortunately, I abuse my printer
by not using it often enough.

Also, I don't change the ink often enough
and let the ink run dry. This is serious
neglect that can lead to my print heads
clogging.

Right now, I'm working on this very problem.
Here are some steps that give me a pattern
that tells me how my printer is behaving.
The pattern reveals all 6 inks separately:

  1. Turn the printer off
  2. Put fresh paper in the paper
    feed
  3. Hold down the middle button, the
    form feed button on my R200
  4. Continue to hold the form feed button
    down while you briefly hit the power button
    to power up
  5. Keep holding the form feed button down
    until a pattern prints on your paper.
  6. Hold the form feed button down continuously
    (don't let go!) until the printer spits out
    the paper
  7. Look at the pattern that the printer printed
    on your clean sheet of paper

Here's a link to something similar. The link
is for an Epson printer model that has 7 inks.
My printer only has 6 ink colors.

However the principle is much the same.
Apparently what I just described above
is called a nozzle check pattern:

Checking the Print Head Nozzles

While this does not fix the printer clogging
problem, it does reveal which nozzles are
giving you a problem.

In the past, I've found that if I reseat the
ink cartridge that is going me a problem that
this will fix the problem.

I know that sounds weird. How can taking the
ink cartridge out of the printer and then putting
it back in fix anything? Well, it does. Sometimes
it does.

Here's something else that can help. Epson has
their manuals online. Here's the manual for
the R200. A nozzle clearing procedure
is described in the manual:

Epson Stylus Photo R200 Printer Basics

Here's an inkjet refill forum that gives you
a test pattern for a 6 ink color printer:

Inkjet Refill Forum

Here's the actual test pattern which has
black, cyan, light cyan, magenta, light
magenta, and yellow:

Six Color Printer Test Pattern

As of this writing, I've solved the problem
for some of my inks but not all of them. Cyan
is still having problems.

What will I try next? I understand that you
can buy clear inks to unclog a clogged printhead.
I may try that next. I assume that a clear ink
is a solvent of some kind. That's my best understanding.

Sounds like a clear ink may be a good idea. Here's
an ink retailer that sells clear ink:

InkSupply.com

Here's where InkSupply.com discusses this issue:

http://www.inksupply.com/epsonclean.cfm

Here's a discussion of purging:

Purging Desktop Printers

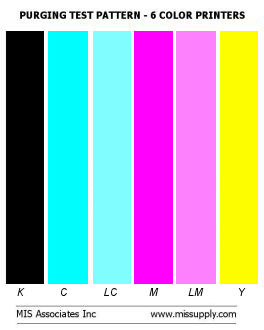
Here's a printer test pattern that I like better than
the one shown above:

Purging Test Pattern
6 color printers


I've printed the same above test pattern over and over
again. So far, it has not cleared my printer. I wonder.
Do I need nozzle cleaning fluid? Here is a 2 oz bottle:

2 Oounce Nozzle Cleaning Fluid

Here's the same thing in a pint bottle:

Pint of Nozzle Cleaning Fluid

While I'm at it, I should probably get new plugs for
my refillable cartridges:

BLACK PLUGS - 2200 EMPTY
CARTS - PACKAGE OF SEVEN PLUGS


Since the R200 has sponges in the ink cartridges, the
above plugs are the right ones. I've contacted technical
support at inksupply.com and they've confirmed this
for me.

I think I'll call InkSuppy.com on Monday and try to
figure out what to do. I'm a repeat customer. Love
their printer inks!

I have a theory as to why I'm in trouble with my printer
inks and why I'm seeing colors that are two light and
have lots of banding.

I think it is because my sponges are full of dry ink.
My refillable cartridges are very dry looking and are
not absorbing ink properly.

How do I know this? For one thing, the sponges are very
light colored compared to the ink. That is to say, the
sponge half of the cartridge is a much lighter than the
color side of the cartridge.

I just refilled my black ink cartridge. My black inch
cartridge accepted 4 more ounces of ink than my color
ink cartridges have been accepting. This tells me that
the ink is very dry in the sponges of my color ink
cartridges.

This is a phenonema that you often see in nature. When
the ground is very dry, the ground will not accept a
sudden downpour of water. Instead, the water runs off
causing flash flooding etc.

I think I'm getting the same sort of effect with my
sponges being too dry. They are not accepting more ink
because these sponges are full of dry ink.

Perhaps a solution to this problem is to come back
in a week and see if my sponges are now raady to accept
more ink.

Update: December 12, 2011

I'm writing exactly one month later
after having purchased new ink from
InkSupply.com and refliing my cartridges
with new ink.

My printer is working perfectly now! and
has been doing so for almost a whole month.

It seems that me letting the ink cartridges
dry out was the whole problem. I was not
using my printer as often as I might and
I was letting the ink cartridges run out of
ink to the point where they were bone dry.

Of the two problem -- using the printer seldom
and allowing the ink cartridges to run completely
out of ink --- I'd say the bigger problem is the
bone dry problem. Letting my ink cartridges run
out and sit there for quite some time bone dry
is a bad bad idea.

Having done this, I've learned a valuable lesson.
I don't think I'll ever let my cartridges run
completely out of ink again.

With my car, I never let the tank get below one
quarter full. I always go to the gas station
when I've got about a quarter tank of gas left
in the tank.

I think I'll use the same system with my ink
cartridges. As soon as they get to one quarter
full, I'll refill them.

Fortunately, Epson makes this easy. Each time
you print a document, the printer shows you just
how full the ink cartridges are. They even give
you a little indicator to indicate 1/4 full,
1/2 full, and 3/4 full. I love my Epson printer!

From this experience I've learned 2 lessons:

  1. Don't let your ink cartridges completely empty
    of ink
  2. If they do empty of ink, don't worry about it.
    Just refill them with ink and let the ink sit there
    day after day turning the ink solids to liquid ink.
    In my experience, it takes about 1 week for the
    printer to fully recover using this method.

The big lesson is patience. Be patient and the problem
solves itself.

It takes fresh ink and patience to solve the problem of
clogged print heads.

Update: February 21, 2012

Got out of bed this morning and tried the print the
above 3 images. I wanted to see if I could get
full magenta coverage on all 3 images.

I used the following steps to do so:

  1. Load a fresh piece of paper in the
    printer
  2. Click on the image
  3. After you click on the image,
    the image should appear in full
    resolution in your browser
  4. Right click on the full
    resolution image
  5. Choose open image in new
    tab
  6. type control-p to print the
    image
  7. Make sure the radio button
    that gives you the option of
    color or black and
    white
    is set to color
  8. In the bottom left corner of
    the screen, look for the words,
    Print using system dialog
  9. Click on the words Print
    using system dialog
  10. When the printer dialog comes
    up, choose preferences
  11. Choose the best photo
    option in the dialog. The best
    photo
    is the top quality radio
    button of 5 radio buttons
  12. Click ok
  13. to actually print

I was able to print one and two
thirds images before the ink ran
out This tells me that I'm going
to have to try something new.

Should I just buy a new print cartridge
or should I try again? I'm not sure.

Ed Abbott